Wednesday, December 29, 2010

Friday, December 24, 2010

Gifts Certificates JUST in Time!

I know this is something I should have done weeks ago, but better late than never I always say! This is for all the last minute gift for all the last minute gift givers out there. Choose between a set amount or a specific item:

Photobucket


You can even print off the gift certificate you purchase and stick it in a stocking or wrap it up in a box. You totally have time to do this for the fashion hound in your life - but you'll have to be quick!

Grab a gift certificate now!

and

M E R R Y C H R I S T M A S!

From,
Classic Hound

Dog Treat Recipes

Peanut Butter & Oat Squirrels
Ginger Bread Muffins
Whole Wheat Peanut Butter Carob Treats

Monday, December 20, 2010

DIY Felt Dog Ornament Classic Hound Style

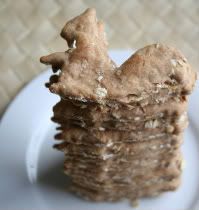
I'm not sure what came over me last weekend, but I decided I needed to have ornaments of my two doggies. So I gave it a go. You know how we love silhouettes here at Classic Hound, so I already had half the work done. Here's the final outcome of my DIY felt doggie ornament adventure:

Photobucket

In case some of you would like to try it yourself (seems like a great Eve of Christmas Eve project to me!), I threw together a little tutorial on now to sew your own doggie felt ornament. This is my first tutorial, so I hope it makes sense! Let me know if you find anything confusing or have any suggestions. Here goes.

Materials

1. Your color choice of felt (I used red wool felt)
2. Heat N Bond (instructions here). Note, you will not be using this fusible material for fusing - just tracing.
3. Iron
4. Pillow Fill
5. Scrap of ribbon for the "collar"
6. 4" ribbon for hanging ornament
7. Thin cardboard (I used one side of a Cheerio's box)
8. Scissors, thread, and a sewing machine
9. Liquid Stitch or hot glue to attach the ribbon/collar for your doggie

Instructions

Photobucket

1. Download and print our (free) greyhound/whippet silhouette and cut it out.

2. Trace the silhouette onto a piece of thin cardboard (I used a Cheerios box).

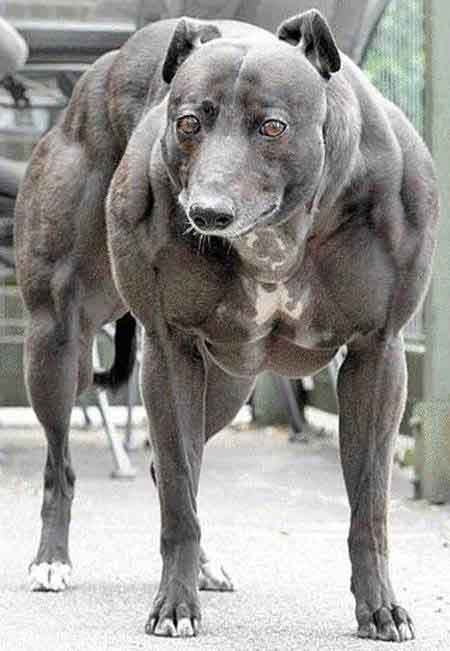
3. This step is important. Carefully cut out the silhouette. Make special care to cute directly ON THE LINES, since you will be tracing and cutting again. This will prevent a chunky looking greyhound, or a mutant looking, bully whippet.

4. Iron a piece of Heat-n-Bond onto the wrong side (not applicable to most felts, but check in case yours has an obvious good and bad side) of your felt.

Photobucket

5. You are basically going to be sewing a doggie "sandwich", so flip your cardboard greyhound/whippet over and trace it's mirror image.

Photobucket

6. Cut out your silhouettes out (cut directly on those lines!). I cut out all along the outside lines and just thought this looked cool.
7. Even looks cool on the other side!
8. Once both silhouettes are both cut, peel of the paper.
9. Grab you 4" piece of ribbon to hang your ornament with, fold it over, and hold it in place (onto the smooth heat-n-bond side), and make your "sandwich". This is a great place to start sewing. Not only are you going to fix your ornament string in place, but you it's a great place to add the last of your stuffing and sew it closed.

Photobucket

10. Start right here on the ribbon.

Photobucket

11. Sew along the edge, about 1/8" seam.
12. Add a little stuffing along the way, about 1/2 way once you've got somewhat of a pocket to work with.
13. Keep going!
14. Stop once you get to the base of the neck.

Photobucket

15. Push the last bit that is unsewn open and a tad bit more stuffing with a chopstick or pen.

Photobucket

16. Back stitch and finish sewing your fantastically new dog ornament closed!
17. Do any trimming of threads and any mismatched edges of the felt.
18. Add some liquid stitch glue exactly where you'd like your collar to go.
19. Tightly wrap and press your ribbon into place.
20. Pinch with a clothespin and let dry.
21. Do a happy dance, because you're done!!!

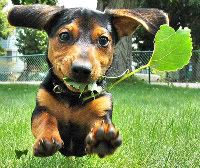
Because Dewey is a super mutt (not to be confused with a super mutant referenced above) I had to draw my own version of they little guy.

Photobucket

Photobucket

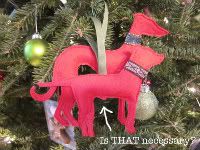
And here they are together! I love them! My husband's first response to my artistic representation of our two dogs, was an immediate, "Was Dewey's "business" REALLY necessary to add there? I mean, seriously? That's pretty gross."

Well.

Yes, it is necessary. Considering how much the dude pees (along with other manly duties), yes, I'd say it was appropriate and necessary.

You may or many not want to add your boy doggie's business, but however you decide to sew your doggie's felt ornament, I hope you'll tell me about it, either here, through email (contact@classichound.com) or on Facebook!

Photobucket

HAPPY ELVING!

Photobucket

Download the greyhound or whippet silhouette here.

Sunday, December 19, 2010

Rudolph the Red Nosed Whippet!


Cute commercial that ends with a cute (and possibly cold) little whippet who looks just like Abby!

Friday, December 10, 2010

Gingerbread Muffins and a Winner!

Photobucket


Little Dude and I made these delicious & cute little Gingerbread Treats from It's A Vegan Dog's Life today for all our Collar Club members. Vegan Dog's Life even has a vegan recipe book that's worth checking out! They were tasty (yes, we tried them too) and would give a high recommendation to anyone who'd like to gift the dog in their life with this delicious and healthy doggie treat!

2 cups flour
1 tsp. baking soda
1 Tbsp. ground flax
1 tsp. cinnamon
1 Tbsp. hulled hemp seeds (optional)
2 tsp. ginger
1 tsp. vanilla extract
2 Tbsp. applesauce
¼ cup blackstrap molasses or agave nectar
1 ¼ cups water

Preheat oven to 350 degrees. Spray mini muffin pans with non-stick spray.

In a large bowl, combine flour, flax, baking soda, hemp seeds, cinnamon and ginger. Add applesauce, vanilla, molasses and water, mixing well. Scoop batter into the muffin pans and bake for 30 minutes. (we only baked for about 5 minutes because we used a mini-muffin pan). Remove and let cool completely before serving. Store in the fridge.

We tried the Cookie variation, and they were quite puffy and sooooo cute! They really seemed like the perfect marriage between a cookie and a muffin.

Cookies- Add ¼ cup of flour at a time until dough is firm enough to form into balls. Place dough balls on a greased cookie sheet and press flat with your hand or a fork. Bake until crispy. We obviously rolled out the dough and used our favorite little gingerbread man and doggie bone cookie cutters.

Photobucket

We do have some leftovers which we've decided to put into all the orders we can until we run out. :-)

=========================================================

Now, drum roll please! The winner of our matching collar and belt contest is . . .

Rhonda Gold!

Thank you everyone for participating! We'll be having more contests so stay tuned.

Monday, December 6, 2010

Introducing The Squirrel Patrol dog collar!

Photobucket

We're nuts for our Squirrel Patrol collars, and we think you will be too! I don't know about your hounds, but both Abby and Dewey go bonkers when they encounter a squirrel. Totally crazy and they want nothing more than to pounce and attack the poor little guys. And the funny thing is that I pretty much did just that when I came across this ribbon. I pounced and attacked it as soon as I layed eyes on it, brought it home, and sewed these bad boys up.


Of course you can also order a belt or mini-martingale keychain for you to if you'd like. All of which make fantastic Stocking Stuffers!

Photobucket

Don't forget to order soon - Christmas deadlines are right around the corner (December 11th for domestic/US orders, and December 7th for International orders).

Sunday, December 5, 2010

Matching Collar and Belt Giveaway!

Photobucket

Finally! WE can be fashion hounds too and match our doggie's collar if we want! :) And just in time for the dog lover in your life this holiday season. Or maybe this is Santa's way of giving you permission to go ahead and gift yourself!

We had a grand ol' time taking pictures yesterday of the ladies of the house sporting the Kona Coffee collar. I put together a little album of some candid moments that were fun. Rhoda was so chill about the whole thing, Abby on the other hand was so excited, she could hardly sit still throughout the whole photo session. Sigh.

Get the flash player here: http://www.adobe.com/flashplayer

It seems I still have a bit more work to do in the training department with my little whippet girl. We're almost there, so close in fact. . . but I digress. Let me get to the point of this post.

It's time for a giveaway on this here blog! It's been months. Literally MONTHS. So I'm making it a doozy.


Contest Closed. Thank you for participating!

1. Leave a comment on this post telling me which belt width you like best -
1", 1.5", or 2".

2. To enter a second time, "like" Classic Hounds Facebook fan page, or if you already do - find someone new to do the same - and come back here and let me know.

3. To enter a third time, share this giveaway on your Facebook or blog, and come back here and let me know.

The winner will be chosen randomly and announced this Thursday, December 9th.
 
Clicky Web Analytics